I've been making some felt fruit for my little girl, I found an amazing list of patterns so I thought I'd share it, here's a picture of my ones! :)
http://www.apartmenttherapy.com/how-to-make-felt-food-free-tutorials-135005
Happy sewing!


Welcome to my blog! Here you will find free sewing tutorials made by me, Holly, plus links to other great patterns and tutorials I've tried and tested and can recommend to you!
I've been making some felt fruit for my little girl, I found an amazing list of patterns so I thought I'd share it, here's a picture of my ones! :)
http://www.apartmenttherapy.com/how-to-make-felt-food-free-tutorials-135005
Happy sewing!
Quite pleased with this little drawing of a cactus! I went to a super craft fair at the weekend, one lady was selling stuffed felt mini cacti like this one. So very cute! I might have a go at sewing one up!

Here's a work in progress, an appliqued and embroidered picture for a wedding gift. The couple love cycling, Holland and the Isle of Wight! :)


I'm having a go at cross stitch! I've already gone horribly wrong a few times, hehe. Following a precise pattern has never been easy for me. Here's my progress. This magazine, Enjoy Cross Stitch, had free floss and lots of pattterns too!

Here's my new card design! It's really easy to do.
Get a collection of matching bits and bobs, buttons, beads and sparkly bits.
Draw your number or shape in glue, very sticky hi tack is the best, then pop your bits on top, sprinkle with glitter before the glue dries for extra sparkle.
You could do numbers, hearts, any simple shape!


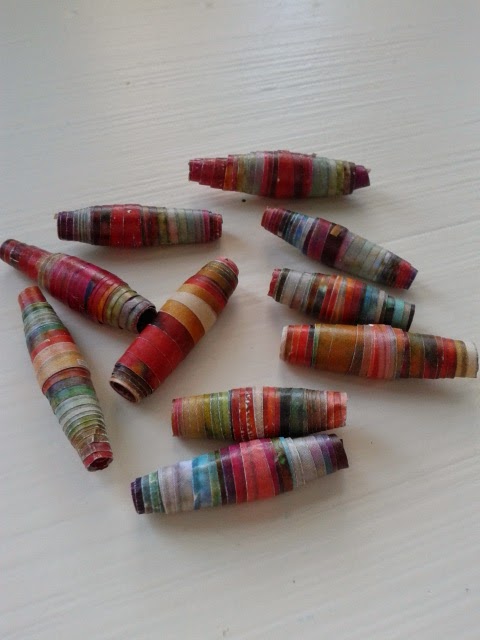
I really enjoyed making these paper beads. They're so easy!
You will need:
Exciting multicoloured paper, a magazine page works well.
A pencil.
Some glue, PVA is best.
Some ribbon or string to thread on to.
1. Cut out long thin triangles from your paper, the length of the base of the triangle is how wide your bead will be.
2. Roll the triangle, base first, not too tightly around your pencil like in the picture below and stop half way.
3. Spread glue on to the triangle and continue to roll to the tip.
4. Smear the glue all over the bead to seal the bead, remove it from the pencil and there's your first bead!
Make lots of beads and thread them on to your ribbon. Tie the ends and you have a necklace!


Here's Tom with his brilliant flag!
First we designed them, then glued and stitched to create the designs on the flag.
They'll look great flying high over the tents later!




.JPG)

.JPG)


